The Screen Studio (Tunio Screen) is a visual editor where you compose what shows on TV panels and other devices: menu boards, lobby screens, schedules, promotions. A screen is built from scenes, and each scene from components (clock, text, marquee, video, and more). The finished screen is linked to a broadcast and shown on a device via Tunio Link, or opened in a browser.
The section is in the left menu — Screen Studio.
How a screen is structured
- Screen — a document with a fixed resolution and orientation (e.g. 1920×1080, landscape). Everything else is built on it.
- Scene — one "frame" of the screen with its own duration, background, and transition. Scenes play in a loop: combine several and you get a slideshow.
- Component (layer) — an element inside a scene: clock, text, marquee, image, etc. Layers stack on top of each other; their order and visibility are configurable.
Building your first screen
Create a screen
In Screen Studio click Create screen — the editor opens with one empty scene.
Give it a name
Click the pencil icon next to the "Open" button and set a clear name — for example, "Cafe Storefront".
Add components
In the Layers card click + Component and pick the elements you need. They appear on the preview canvas.
Save the screen
Click Save screen. Now it can be shown on a device.
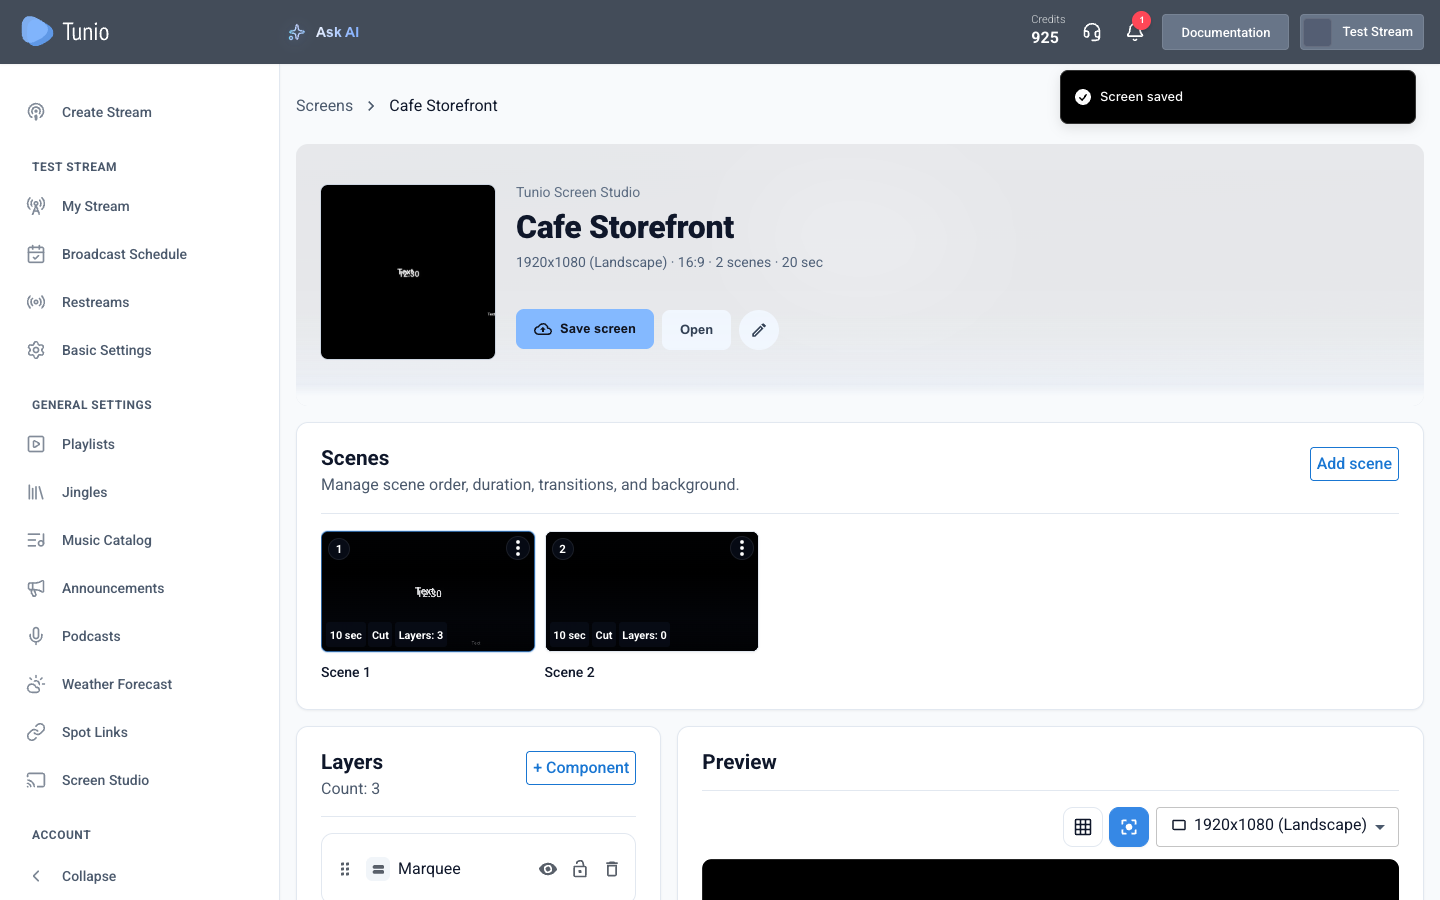
The editor has three work areas: top-left — Scenes (the screen's frames), bottom-left — Layers (components of the active scene), right — Preview with the canvas, grid, and snapping.
The preview shows the screen in real time: everything you change in scenes and layers is reflected on the canvas immediately — and is pushed to every connected device once saved.
Next: more on scenes and components and on showing a screen on a device.
Create your first screen